The Camera
So far, you 've only done small and simple things that haven 't required you to do too much with the Hammer interface, but now we will discuss one of the key elements that you 'll be using a lot -the camera.
- Lets Move
You've already learned to use the camera in the three 2D view ports. The 3D view is more complicated but is also a very useful tool.
a) Hover your mouse over the 3D view port (top left). At the moment you should be seeing a very close-up view of the pillar you just made.
b) Press the Z key and move the mouse around slowly. The windows camera moves in all the planes as you move the mouse.
c) To move Vertically, Horizontally, or any other direction use the W, A, S and D keys.
d) Press the Z key again, and you’re back to normal design movements.
TIP: Pressing the esc key while in Camera mode, will set the camera to the projects due north, or 0 degrees.

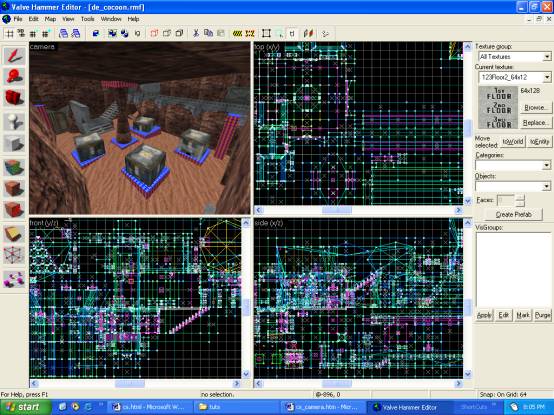
Camera Tool in action (de_cocoon by amckern)
With these controls, you can move the camera anywhere in the map you need to see something. You can also see the object from any angle.
There is also only 1 map tool that will work properly in camera view, and that is the decals tool, to use the tool you need to have decals.wad in your texture list, because the decal tool will only apply these decals with errors.
- Lets Change our prospective
To change the prospective of any given view port simply:
a) Right click on any design view port to display the Context menu.
b) Use the commands on the Context menu.
- What to see what the room will look like in game?
To change the to change the view that your camera presents:
a) Click the name of the view
b) Chose a new one from the drop down list
c) Its best to use 3D TEXTURED in 3d view if your video card supports Open GL. 3D Flat shading and wire frame display are useful for seeing how your brushes are laid out, since textures can obscure seams between two brushes, making some tasks difficult. These modes are also faster in some cases, so if hammer runs especially slowly on your machine you may want to use them to speed things up.
That’s it with the camera now, on to some more brushwork
![]()