Brush Power Tools
Even with hammers primitives and its wonderful clip tool, you still can’t create all of the brushes you want in a single step. Hammer has three main tools for changing the actual shape of a brush: Hollowing, Carving, and clipping Mode.
The reason that these tools are in a section called “Power Tools” is because that 's what they are. While they are very useful tools, they are also very effective for destroying brushes, making your levels slower to process and slower to run, making bad designs worse, and not mention, cause major head aches for you, and your compelling software. As in carpentry, think twice before you cut. Be sure of what you will get before using these tools. Also, don 't forget about the undo ability in hammer if you do go wrong.
Using hollowing, you can empty the inside of a brush, like hollowing out a pumpkin. For a demonstration of how to use this technique, you can very quickly build a box around your entire level to contain it for processing. This is also known as an n00b box, as allot of new b mapmakers uses these boxes to stop leaks that the map might have had. Their bad because it causes high read speeds (R_SPEEDS), slow down compile times, and can cause player drops, or server crashes.
Though to do it on non-final compiles I'll teach you how to do it.
- Chose a texture from the filter "dirt"
- Draw a square brush that surrounds the whole level in the top view and make it 1024 units tall. That 'll make it large enough to contain the whole level with some space left over.
- Now, with the big new brush (and nothing else) selected, click Tools and then from the tools menu make Hollow from the Brush menu.
- When prompted, enter -64. A -number tells hammer to make the brush hollow inside the brush, and not out side of it. This value is the thickness of the walls of the brush, which will be created around the brush. Then the original brush is deleted.
You 're probably annoyed that you've been taught to create rooms using the slower method of laying out each of your wall brushes and ceilings by hand instead of just creating and hollowing cubes. However, if you look at the created brushes, you 'll see that hammer created brushes whose edges are bevelled instead of straight.
This is to fit them together neatly with the minimum number of faces Visible, although in some cases hollowing can drive up the number of faces on your brushes, leading to higher polygon counts inside your game. Also, because of the bevelled edges, hollowed rooms must be resided by moving vertices, instead of by moving whole brushes.
Hollowing can be useful, especially when the bevels fit in with the design of your room, or are in areas that wont affect the rest of the layout. If you 're using it in an area of the map that you plan on changing a great deal, consider building your brushes by hand instead. It’s usually neater even if it is slower.
You can also make your hollow box into world brushes by selecting it, and then pressing ctrl + u, which will ungroup them, and make them world brushes. But because of the bevelled edges, hammer, ads even more pollies to them to make them normal world brushes, that can increase the read speeds.
Your next tool is carving, also known as CSG Subtraction. Its similar to hollowing and the two can even be used interchangeably for some purposes. However, as with hollowing, it can often produce unintentional results.
In order to carve a brush, first you need to create the brush to be carved. Next, you need to create a second brush that will serve as a tool to carve with. As you may guess from the name of the operation, the volume of the second brush will be subtracted from the volume of the first brush.
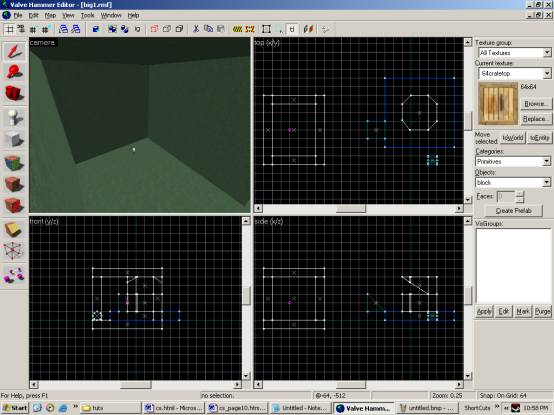
As an example, you can bevel an edge off of the top of your pillar to give them a little more of an interesting look.
- Select the ramp
- Copy (CTRL+C) and Paste (CTRL+V) it
- Now move it so that it overlaps the outside edge of the pillar.
- Re size the copied ramp so that its edge is a 45-degree slope in the Front view, then re size it in the top view so that it overhangs the north and south edges of the pillar a little.
- You should get a brush that looks like this:
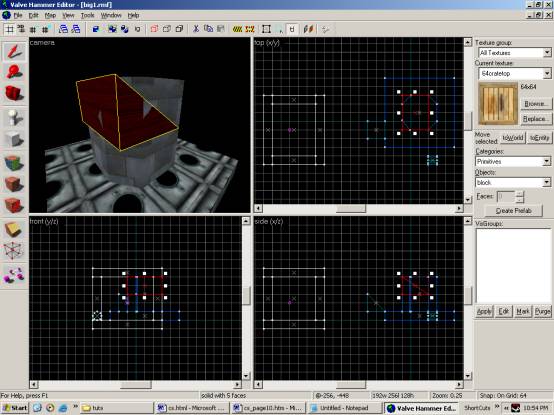
The purpose of the overhang is to make sure that the brush cleanly carves the surface of the pillar. It’s not necessary, but it’s a good idea. Hammer may occasionally create a bad edge or face when using carving, and overhanging a little helps to minimize the chances of this. If it does happen to you, use undo to back up and then try re sizing your carving brush to overhang the area where the problem appeared if its possible to do so.
If you cant overlap the carving brush for some reason, see the section on fixing damaged brushes later in this chapter. It includes techniques that might help you fix any damaged brushes that result. You may also be able to use splitting planes (which you 'll learn about next) to do what 's needed.
Notice that your carving brush only touches the pillar and not any of the other brushes in the level. That 's because carving with a brush cuts its shape out of any other brushes it’s touching. Make sure that your carving brush isn't touching anything you don 't want to carve. You can select both the column and the carving brush, then use the Hide Inverse command on the Selection menu to hide brushes that are in the way. Then select any brush and use the Un hide Inverse command to bring them all back. Alternately, you can move the carving brush and the brush to be carved to an area of the level that 's open enough to avoid the problem and move them back when you 're done.
Once you have the carving brush in place (make sure only the carving brush is selected), use the Carve command on the Tools menu. Move the carving brush away from the column and look at the result. What you should see is that a new edge has been carved off of the column, leaving a large bevelled edge. As with re sizing brushes, its a good idea to line your carve up so that any new vertices stay on the grid, although this is most often a problem for brushes you plan on doing more to after the carve. If you 're building chunks of rubble, you may not care as much about the results being on the grid.
This technique can be used with more complex shapes as well. If you stick a cylinder shaped brush into a wall to make a doorway or into a ceiling to make a window, you can create some very complex effects quite quickly. However, as with hollowing, your decisions on how to lie out brushes are very often better than the computers, and your cuts are probably going to be neater and easier to understand.
Note: You might want to create some brushes outside the current map and try playing with carving for a little bit to better familiarize yourself with how it tends to cut before moving on. Try more complex carving shapes and carving multiple brushes at once. Be sure to watch the brushes that you get as a result. To more easily view the splits on your brush faces, turn off the textures. Click on the word Camera, and chose 3D Flat.

![]()